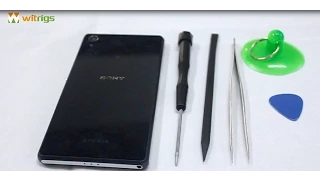
Sony Xperia Z2 is completely disassembled here by witrigs.com. Hope this Xperia Z2 disassembly video can be your guide when you need to repair it.
- OEM LCD Screen Replacement for Sony Xperia Z2: https://zegsu.com/s/di8rf
- OEM Back Cover Sticker for Sony Xperia Z2: http://bit.ly/1EHtBW3
- OEM LCD Supporting Frame Sticker for Sony Xperia Z2: https://zegsu.com/s/di8sw
- Replacement Parts for Sony Xperia Z2 : https://witrigs.com/d2vmi
Steps.
00:08 Remove the back cover
01:44 Remove the six screws and battery
02:42 Remove the black bracket
02:56 Loosen the connectors on the board and remove the motherboard
03:42 Remove the front camera
04:45 Remove the rear camera
05:45 Remove the antenna RF cable
06:10 Remove the speaker assembly
08:05 Remove the main flexible cable
11:16 Remove the magnetic charging flex cable
12:54 Remove the headphone jack assembly
14:46 Remove the earpiece speaker
15:24 Remove the vibrator
15:55 Remove the speaker
16:24 Remove the antenna logic board
Tools.
1. heat gun or hair dryer - https://zegsu.com/s/dj44c
2. Suction cup - http://bit.ly/1Mbid2L
3. Guitar plectrum - http://bit.ly/1E6tMWJ
4. Spatula - http://bit.ly/1zlSaEG
5. Phillips screwdriver - http://bit.ly/1BNDNcw
6. tweezers - http://bit.ly/1IunSA2
Witrigs not only offers cell phone repair tutorials, including disassembly, assembly and parts replacement guides, but also cell phone accessory review videos on YouTube.
Publisher. Witrigs - http://bit.ly/1Avo6o3
Witrigs YouTube channel - http://bit.ly/1HZTLkL
If you are interested in DIY cell phone repair or the latest cell phone accessory reviews.
Subscribe to us on YouTube: http://bit.ly/1xNoHlm
Follow us on Twitter: http://bit.ly/1yIu32C
Like us on our Facebook page: https://facebook.com/witrigsphonerepair
Contact us on Facebook at: https://messenger.com/t/witrigsphonerepair
Add us on Google+: http://bit.ly/17oOFBN
Subscribe to us on our blog: http://bit.ly/14xGAJ6

